
Installing kitchen sink plumbing can seem daunting, but with the right tools, materials, and a clear step-by-step guide, many homeowners can successfully tackle this DIY project. Proper plumbing installation is crucial to prevent leaks, ensure efficient drainage, and maintain a hygienic kitchen. This guide will walk you through the process, from understanding the basic setup to sealing and troubleshooting, empowering you to connect your new kitchen sink with confidence.
Tools and materials you’ll need
Before you begin, gather all necessary tools and materials. Having everything on hand will make the installation process smoother and prevent interruptions.
Tools:
- Adjustable Wrenches: For tightening nuts and connections.
- Basin Wrench: Essential for tightening nuts in tight spaces behind the sink, especially for faucet mounting nuts.
- Pliers (Channel Locks or Tongue-and-Groove): For gripping and turning pipes and nuts.
- Screwdrivers (Phillips and Flathead): For faucet mounting screws and other components.
- Plumber’s Putty: For creating watertight seals around strainers and faucet bases.
- Silicone Sealant (Kitchen & Bath Grade): For sealing the sink to the countertop.
- Utility Knife or PVC Pipe Cutters: For cutting PVC drainpipes if adjustments are needed.
- Measuring Tape and Pencil: For accurate measurements.
- Bucket and Rags: For catching water and cleaning up spills.
- Level: To ensure drainpipes have a slight downward slope.
- Flashlight or Headlamp: For better visibility under the sink.
- Safety Glasses and Gloves: For personal protection.
Materials:
- New Faucet: Ensure it comes with all necessary mounting hardware and supply lines (or purchase supply lines separately).
- Basket Strainer(s): One for each sink basin.
- P-Trap Kit: Includes the U-shaped trap, a tailpiece, and necessary slip nuts and washers.
- Continuous Waste Kit (for Double Sinks): Connects the two sink drains to a single P-trap.
- PVC Pipe and Fittings (if needed): If you need to extend or reconfigure your drain lines.
- Water Supply Lines: Two flexible braided stainless steel lines (one for hot, one for cold) to connect the shut-off valves to the faucet. Ensure they are long enough.
- Thread Seal Tape (PTFE Tape/Teflon Tape): For sealing threaded pipe connections.
- Optional: Garbage Disposal: If installing, ensure it comes with its mounting hardware and drain connections.
- Optional: Dishwasher Air Gap/Drain Hose: If connecting a dishwasher.
Understanding drain and supply line setup
Before diving into installation, it’s helpful to visualize how the water supply and drainage systems work under your sink.
- Water Supply Lines:
- Typically, there are two shut-off valves under the sink: one for hot water (usually on the left) and one for cold water (on the right).
- Flexible supply lines connect these valves to the hot and cold inlets on your faucet. These lines are under constant water pressure.
- Drainage System:
- Basket Strainer: The entry point for wastewater from the sink basin.
- Tailpiece: Connects the strainer to the P-trap (or garbage disposal).
- P-Trap: The crucial U-shaped bend that holds a small amount of water. This water seal prevents noxious sewer gases from entering your home. It also catches small items accidentally dropped down the drain.
- Waste Arm: The horizontal pipe connecting the P-trap to the main branch drainpipe in the wall.
- Branch Drainpipe: The vertical pipe in the wall that carries wastewater away.
- Vent Pipe: An often unseen but vital component. This pipe extends from the drain system up through the roof, allowing air into the drainpipes. This prevents a vacuum from forming (which would cause slow drainage and siphon water from the P-trap) and safely vents sewer gases.
- Single vs. Double Sinks:
- Single Sink: A straightforward setup with one basket strainer, one tailpiece, and one P-trap connecting to the wall drain.
- Double Sink: Requires a “continuous waste” assembly. The two basket strainers connect to a horizontal pipe that then leads to a single P-trap. If a garbage disposal is present, it’s usually installed on one side, and the other basin’s drain connects to it before the P-trap.
Step-by-step plumbing installation
Follow these steps carefully for a successful installation. Remember to always work safely and turn off the water supply before starting.
Step 1: Prepare the sink and countertop
- Turn Off Water: Locate the hot and cold shut-off valves under the sink and turn them clockwise until fully closed. If no valves are present, turn off the main water supply to your home.
- Clear the Area: Remove any old plumbing, buckets, or items from the cabinet under the sink.
- Install the Sink (if not already in place):
- For drop-in sinks, apply a bead of silicone sealant or plumber’s putty around the rim of the sink opening on the countertop. Carefully lower the sink into the opening and press down firmly. Secure it from underneath with the provided clips or fasteners. Wipe away excess sealant immediately.
- For undermount sinks, these are typically installed by professionals before the countertop is permanently set, or they are securely clamped and epoxied to the underside of the countertop.
Step 2: Install the faucet
- Mount the Faucet: Insert the faucet body through the pre-drilled holes in the sink or countertop.
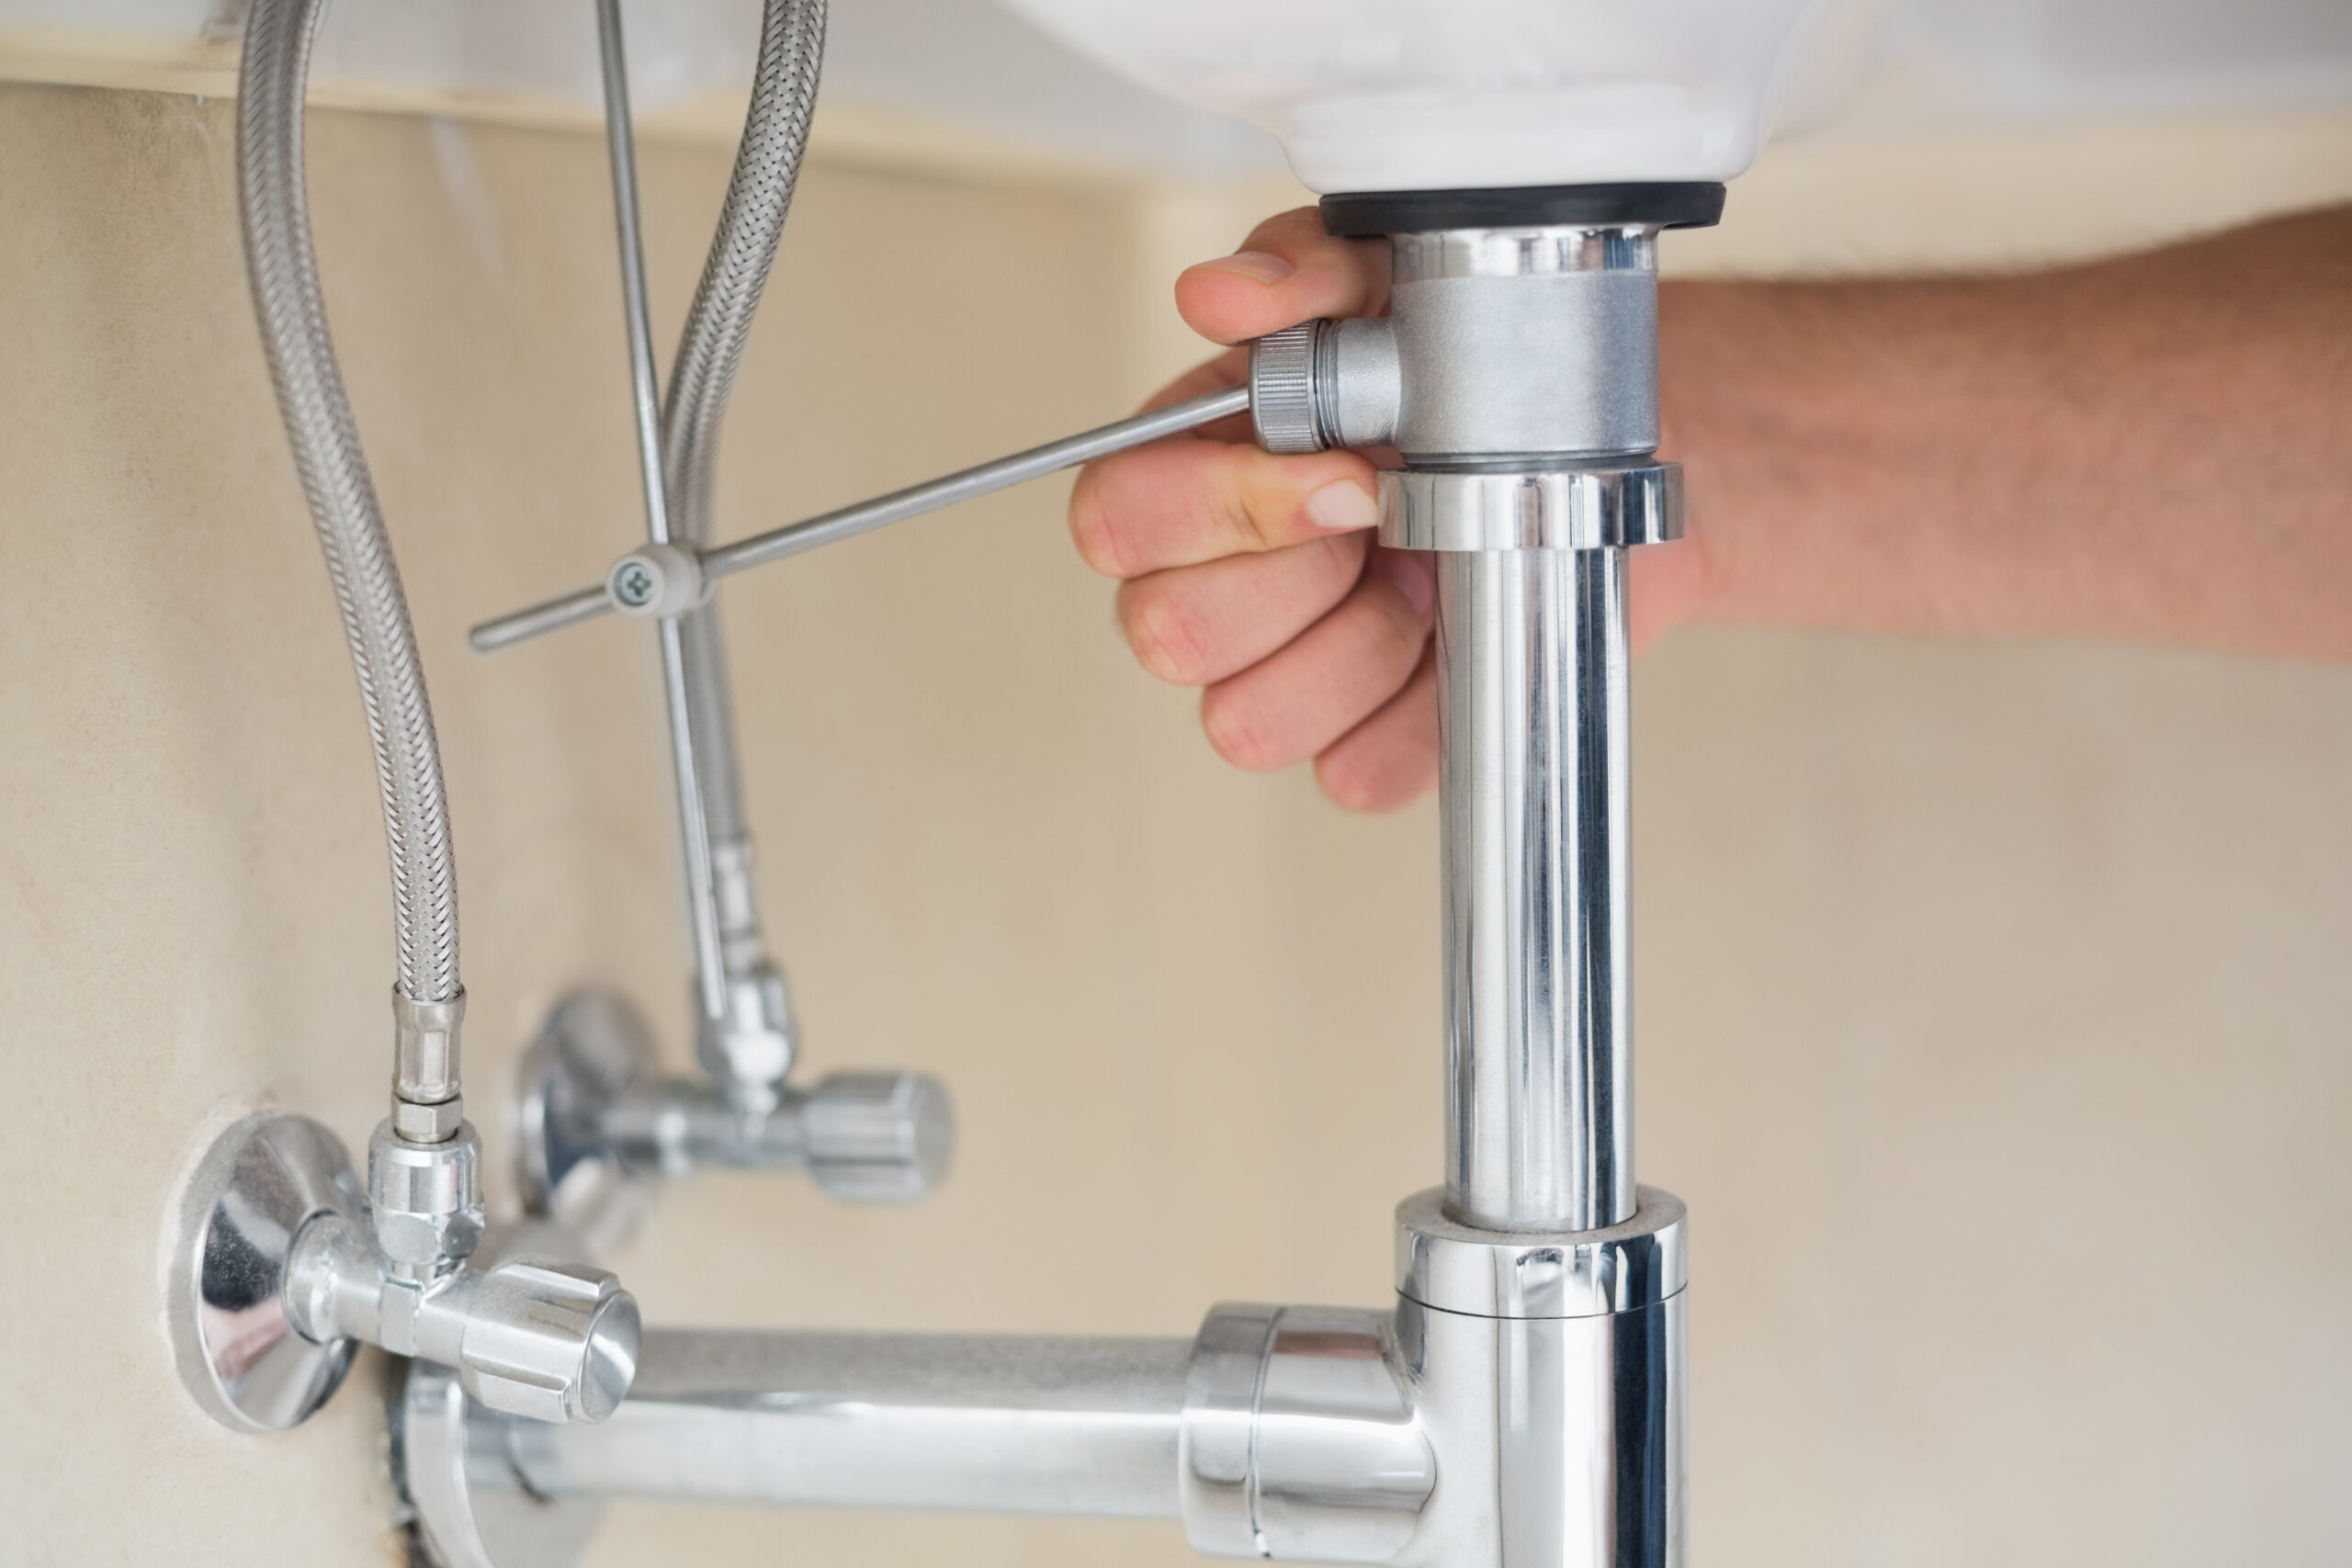
- Secure from Below: From underneath the sink, attach the rubber gasket, metal washer, and mounting nut(s) onto the faucet’s threaded shank(s). Use a basin wrench to tighten these nuts securely, ensuring the faucet is straight and doesn’t wobble.
- Connect Supply Lines to Faucet: Hand-tighten the hot and cold water supply lines to the corresponding inlets on the underside of the faucet. Use an adjustable wrench to give them a final quarter-turn, but do not overtighten.
Step 3: Install the basket strainer(s)
- Apply Plumber’s Putty: Roll a thin rope of plumber’s putty and apply it around the underside of the flange (the top rim) of the basket strainer.
- Insert Strainer: Drop the strainer into the sink’s drain opening. Press down firmly.
- Assemble from Below: From underneath the sink, slide the rubber gasket, friction washer, and large locknut onto the strainer’s threaded tailpiece. Hand-tighten the locknut, then use a large adjustable wrench or pliers to tighten it securely. Wipe away any excess plumber’s putty that squeezes out from above the sink.
Step 4: Install the garbage disposal (if applicable)
- Mounting Assembly: Follow the manufacturer’s instructions to install the disposal’s mounting assembly to the basket strainer. This typically involves a series of rings, gaskets, and a locking mechanism.
- Connect Dishwasher Drain (if applicable): If you have a dishwasher, you’ll need to remove the knockout plug on the side of the disposal (use a screwdriver and hammer) and connect the dishwasher drain hose. Secure it with a hose clamp.
- Hang Disposal: Lift the disposal unit and align its mounting collar with the assembly under the sink. Twist or tighten the locking ring until the disposal is securely locked in place.
- Electrical Connection: If you’re replacing an existing disposal, connect the electrical wiring (ensure power is off at the breaker!). If it’s a new installation, this should be done by a licensed electrician.
Step 5: Assemble the drain system (P-Trap and Waste Arm)
- Connect Tailpiece: Attach the drain tailpiece (or the disposal’s drain outlet) to the top of the P-trap. Use a slip nut and washer, hand-tightening first, then a quarter-turn with pliers.
- Connect to Wall Drain: Align the P-trap with the drainpipe coming out of the wall (the waste arm). If necessary, use a utility knife or PVC pipe cutters to trim the P-trap or waste arm for a perfect fit. Ensure there is a slight downward slope from the P-trap towards the wall drain for proper drainage.
- Secure Connections: Connect the P-trap to the waste arm using a slip nut and washer. Hand-tighten all slip nuts, then give them a final quarter-turn with pliers. Do not overtighten, as this can crack plastic pipes.
- For Double Sinks: Install the continuous waste pipe between the two basket strainers (or between one strainer and the disposal). Then, connect the continuous waste to the single P-trap, and the P-trap to the wall drain, following the same principles.
Step 6: Connect supply lines to shut-off valves
- Connect Supply Lines: Hand-tighten the flexible supply lines from the faucet to the hot and cold shut-off valves.
- Tighten: Use an adjustable wrench to give them a final quarter-turn. Again, avoid overtightening.
Sealing, testing, and troubleshooting
Once everything is connected, it’s time to test for leaks and address any issues.
- Check All Connections: Double-check every slip nut, mounting nut, and supply line connection to ensure they are snug.
- Slowly Turn On Water: Gradually turn on the hot and cold shut-off valves under the sink. Listen for any immediate drips or hisses.
- Inspect for Leaks:
- Faucet Base: Check around the base of the faucet for any water seeping out.
- Supply Lines: Run your hand along the entire length of both hot and cold supply lines, feeling for moisture. Check connections at both the faucet and the shut-off valves.
- Drain Assembly: Pay close attention to all slip nut connections on the tailpiece, P-trap, continuous waste (if applicable), and where the drain meets the wall.
- Garbage Disposal: Check all connections to and from the disposal unit.
- Run Water: Fill the sink basin(s) halfway, then pull the stopper and let the water drain completely. While it’s draining, carefully inspect all drain connections for leaks.
- Fill and Hold: For a more thorough test, fill the sink completely and let it sit for 5-10 minutes. Then, release the stopper and observe for leaks during drainage.
- Troubleshooting Leaks:
- Drip at a Slip Nut: Gently tighten the slip nut a bit more. If it still leaks, disassemble the connection, inspect the washer (it might be old, cracked, or misaligned), replace it if necessary, and reassemble.
- Drip at Faucet Base: If you used plumber’s putty, it might need to be tightened further from below. If using a rubber gasket, ensure it’s seated correctly.
- Drip at Supply Line Connections: Tighten the nuts slightly. If it persists, ensure thread seal tape was applied correctly (for threaded connections) or that the ferrule/gasket is seated properly.
- Test Garbage Disposal: If installed, ensure it runs smoothly and drains properly.
- Final Cleanup: Wipe down all pipes and surfaces. Reinstall cabinet contents.
Common mistakes to avoid
Avoiding these common errors will save you time, frustration, and potential water damage.
- Not Shutting Off Water Completely:
- Mistake: Forgetting to turn off the water supply before starting work.
- Avoid: Always turn off the hot and cold shut-off valves under the sink. If they don’t work or are absent, turn off the main water supply to your home.
- Overtightening Plastic Connections:
- Mistake: Using too much force on slip nuts on PVC or ABS drainpipes.
- Avoid: Hand-tighten plastic slip nuts first, then give them only a quarter-turn (or a half-turn at most) with pliers. Overtightening can crack the plastic, leading to leaks.
- Not Using Plumber’s Putty or Silicone:
- Mistake: Skipping sealant where needed (e.g., around the basket strainer flange, sink rim).
- Avoid: Always use plumber’s putty for the basket strainer flange. Use silicone sealant for the sink rim where it meets the countertop.
- Incorrect P-Trap Assembly:
- Mistake: Assembling the P-trap backward or without proper washers.
- Avoid: Ensure the U-bend is correctly oriented to hold water, and all washers are correctly seated within the slip nuts.
- No Slope in Drain Lines:
- Mistake: Horizontal drainpipes (waste arm) that are perfectly flat or slope upwards.
- Avoid: Ensure a slight downward slope (about 1/4 inch per foot) from the P-trap towards the wall drain. Use a level to check. This ensures proper drainage and prevents standing water in the pipes.
- Forgetting to Remove Disposal Knockout Plug:
- Mistake: Installing a garbage disposal without removing the knockout plug for the dishwasher drain.
- Avoid: Before installing the disposal, use a screwdriver and hammer to punch out the plug from the inside of the disposal’s dishwasher inlet.
- Not Testing Thoroughly:
- Mistake: Turning on the water and assuming everything is fine without careful inspection.
- Avoid: Slowly turn on water, visually inspect all connections, then fill and drain the sink while checking for leaks. Don’t rush the testing phase.
- Using the Wrong Tools:
- Mistake: Trying to use regular pliers for tight faucet nuts.
- Avoid: Invest in a basin wrench; it’s designed for those awkward spaces and makes the job much easier.
- Ignoring Local Codes:
- Mistake: Making significant changes without understanding local plumbing codes.
- Avoid: For major modifications or if you’re unsure, consult a licensed plumber. They are familiar with local regulations and can ensure your installation is safe and compliant.
By following this guide and paying attention to detail, you can successfully install your kitchen sink plumbing, ensuring a functional and leak-free system for your home.
Need professional help with your kitchen plumbing or a full kitchen renovation? LA Home Builders specializes in expert kitchen remodels, including precise plumbing installation and repair. Our experienced team ensures your kitchen is not only beautiful but also fully functional and up to code. Contact us today for a free consultation!